

ESO Darkshade Caverns 1 Dungeon
Darkshade Caverns 1 is an easy Dungeon you can complete in ESO. There is also a more challenging Dungeon you can complete in this same area, once you reach a higher level, Darkshade Caverns 2! Despite being an easy overall Dungeon, there are a few mechanics that can challenge you and your group! The Dungeon is available with the Base Game(no DLC required) and its entrance is on the Eastern part of the Deshaan zone! In total there are six Bosses in the Darkshade Caverns 1 Dungeon. This Darkshade Caverns 1 Dungeon Guide will focus on the Boss fights and their attack patterns.
Armor Sets in Darkshade Caverns 1 Dungeon ESO
There are four Armor Sets you can get from enemies in the Dungeon, a Light, Medium, Heavy and a Monster Set. The armor Sets you can farm here are:
- Netch’s Touch, Light Armor Set
- Strength of the Automaton, Medium Armor Set
- Armor of Truth, Heavy Armor Set
- Sentinel of Rkugamz, Monster Set(Final Boss, Veteran difficulty only)
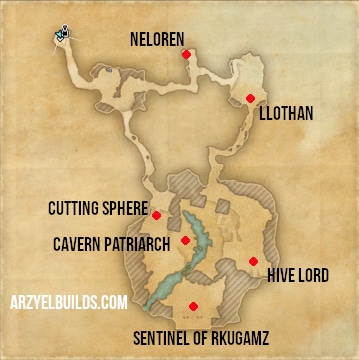
Bosses in Darkshade Caverns 1 Dungeon ESO
You can find the Bosses of the Dungeon by simply following the path inside. They are all quite easy to defeat but they do have a few interesting mechanics. Some of their hardest mechanics only appear in Veteran Difficulty.
Head Shepherd Neloren – Darkshade Caverns 1
The first boss of the Dungeon that you can skip if you wish! Neloren has two adds and a few Kwama workers near her.
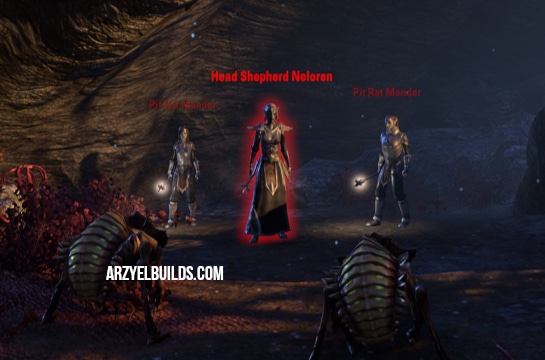
An easy Boss with a few simple mechanics. Her Light Attacks are weak and will not trouble the tank. She can heal the adds so it will be wise to kill those fast. She can also heal herself and this is something she does often. When she starts healing herself, interrupt her to stop the healing!
Her strongest offensive move is a pair of fireballs she fires during the fight. The fireballs will land on the ground dealing AOE damage but are easy to avoid. Neloren can also cast a ground trail of fire towards whoever has aggro. Block or avoid this.
Foreman Llothan – Darkshade Caverns 1
You have to defeat this Boss in order to proceed!
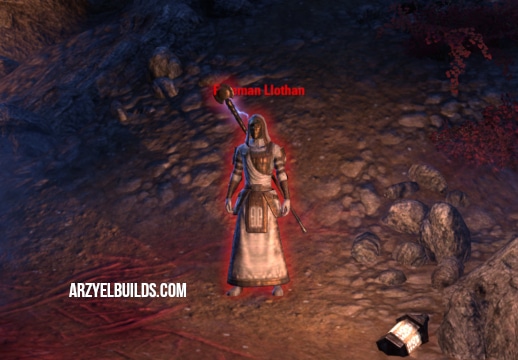
An overall easy Boss with weak Light Attacks. Llothan will pick a player randomly and throw poison. The poison lingers as an AOE and can deal good damage if you stand on it. Occasionally he will also charge an AOE underneath him that will explode and deal significant damage to players. Get out of the AOE to avoid being damaged by this move. Llothan moves around the area, summoning multiple enemies. Although the enemies are easy to kill, they will overwhelm you if you ignore them. Try to gather them together and kill them with AOE skills.
The Hive Lord – Darkshade Caverns 1
You can skip this Boss if your goal is to finish the Dungeon fast. In general this is an easier than it looks fight!
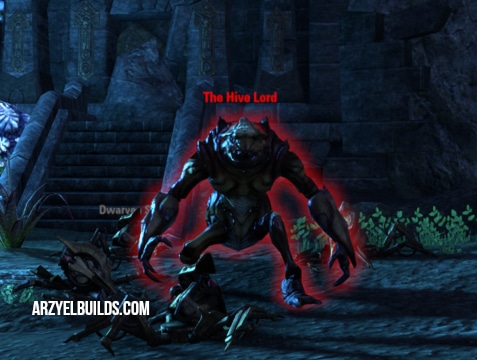
The Tank should aggro and face him away from the rest of your group. His Light Attacks will not deal much damage and are easy to block. Occasionally he will smash the player with aggro(Tank). This is a front conal attack and will deal damage to anyone behind the Tank! He will also summon adds to assist him. A small AOE will appear and three Kwama will spawn from it.
If a player is standing farther away, the Hive Lord will jump to them and stun them. It is better to stay near the Boss to avoid this mechanic. Finally during the fight he will start pounding the ground, creating a large AOE that deals significant damage. You can interrupt this mechanic!
Cavern Patriarch – Darkshade Caverns 1
Another very easy Boss in this Dungeon.

His main attack is a Poison throw. He will pick a player randomly and throw poison at them. The poison will leave a large AOE behind. Stay out of the AOE and reposition the Boss if necessary. His Light Attacks are not scary and you can block his Heavy Attack to avoid the damage!
Cutting Sphere – Darkshade Caverns 1
An overall easy Boss with a few strong attacks. Clear the area in front of it first so you can focus on its mechanics. You can skip it unless you are trying to complete the Dungeon’s quest!

Its deadliest attack is a whirlwind-like skill it has. Stay away from it while the Tank holds aggro and blocks. Occasionally it will jump and slam on the ground dealing significant AOE damage. The Tank should block to deal with this mechanic. Everybody else should keep their distance. It can throw a projectile that deals good damage and use a charged attack that releases steam forward. This can be devastating but you can interrupt it!
Sentinel of Rkugamz – Darkshade Caverns 1
The Final Boss of the Dungeon. Clear the area in front of it before you engage!
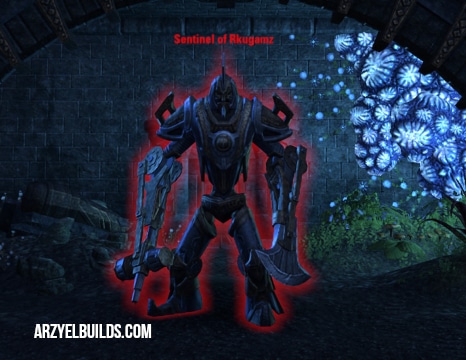
The Boss has three phases. During the fight it will switch between them multiple times. The three phases are color coded:
- Red
- Blue
- Green
Depending on the active phase, the Boss will change color! You can easily tell which phase is active by its face color! When in Red Phase, the Boss will use its deadliest attack, which is a whirlwind-like skill. It will pick a player randomly and follow them around, dealing significant damage. Kite the Boss until it switches phases! The Tank should be able to stand still and block it. When in Blue Phase, the Boss will stand still and fire Shock Projectiles. The projectiles land on the ground, dealing good AOE damage.
When in Green Phase, the Boss will attack repeatedly the player with aggro. The Tank should turn it away from the group because this is a front conal attack that will deal significant damage to everyone caught in it. It will also use a devastating Heavy Attack that the Tank should Block! It will also summon Centurion Spiders that can heal it. Do not let the Boss stand near their healing AOE!

Arzyel is a passionate Gamer and huge fan of the Elder Scrolls Series! A professional Content Creator and owner of the arzyelbuilds.com website that is focusing on The Elder Scrolls Online with the Best ESO Builds and Guides, as well as Throne and Liberty content with several TL Builds and Guides! Arzyel also publishes videos on his YouTube channel!
Thanks to his experience in Gaming and especially Online Gaming, Arzyel can create practical and effective Builds & Guides for ESO, Throne and Liberty and other titles, that are perfect for both New and Veteran Players! For more info you can check his Linktree and his About Me page.