

ESO Darkshade Caverns 2
Darkshade Caverns 2 is a quite challenging Base Game Dungeon you can complete in ESO! The Final Boss fight especially will wipe your group multiple times, if you are not familiar with the mechanics and do not have enough DPS! The Dungeon takes place in the same area as Darkshade Caverns 1! The Dungeon is available with the Base Game(no DLC required) and its entrance is on the Eastern part of the Deshaan zone! In total there are five Bosses in the Darkshade Caverns 2 Dungeon. This Darkshade Caverns 2 Dungeon Guide will focus on the Boss fights and their attack patterns.
Armor Sets in Darkshade Caverns 2 Dungeon ESO
There are four Armor Sets you can get from enemies in the Dungeon, a Light, Medium, Heavy and a Monster Set. The armor Sets you can farm here are:
- Netch’s Touch, Light Armor Set
- Strength of the Automaton, Medium Armor Set
- Armor of Truth, Heavy Armor Set
- Engine Guardian, Monster Set(Final Boss, Veteran difficulty only)
Bosses in Darkshade Caverns 2 Dungeon ESO
You can find the Bosses of the Dungeon by simply following the path inside. They are simple to defeat as long as you focus on their mechanics. Some of their hardest mechanics only appear in Veteran Difficulty.

The Fallen Foreman – Darkshade Caverns 2
The first Boss of the Dungeon and a simple one! There are a few normal enemies around him that are easy to defeat with AOE skills!

His Light Attack is rather weak and you can simply ignore it. He will occasionally buff himself and move backwards as well as throw a skull to whoever has aggro! His deadliest attack is a flamethrower-like move! He will raise his staff and attack with his flamethrower clockwise. This move can deal significant damage and kill anyone low on Health! Avoid it by getting out of its range or simply move clockwise along with it!
Transmuted Hive Lord – Darkshade Caverns 2
This Boss spawns with two minions on his sides, a Sedating and a Draining Scrib! The Tank should aggro all three and turn them away from the group.
The two Scribs light attack players but also cast charged attacks! One will stun the player and the other can drain resources! If you kill them, they will re spawn so the best strategy is to hold aggro and interrupt them when they charge their special move!
The Boss itself can deal some good damage with its light attacks, which is why you should turn it away from the rest of your group. It will occasionally also slam the ground, dealing AOE damage! During the fight the Hive Lord will summon a shield and start slamming the ground repeatedly! This move deals significant AOE damage and to stop it you will have to take down its shield!
Tansmuted Alit – Darkshade Caverns 2
A group of three Alit enemies with a few simple attacks! The trick to this fight is to kill all three at the same time. If you fail to kill them fast, the dead Alit will be resurrected!

The Tank should aggro all three and keep them aggro-ed! The Alit bite(light attack), do a jump attack(block and you will be fine) and use a small AOE against whoever has aggro(the Tank!). Keep them together and lower their Health evenly. Kill all three fast together to avoid dragging on this fight!
Grobull the Transmuted – Darkshade Caverns 2
The most annoying Boss in the entire game! It requires good DPS and AOE damage to kill it fast and avoid unnecessary deaths!
When you attack, the boss it will summon a lightning shield that reflects projectiles! While the shield is up, Grobull only takes around 10% of the damage you deal to him. The best thing to do in this phase is to aggro it as a tank and ignore it! It will teleport to the player with aggro and discharge a nasty shock AOE on the ground. Block to survive.
Grobull also summons swarms of Netchlings! These are the real threat in this fight, since they can overwhelm your group fast! Try to group them together and use AOE to kill them. Every netchling that dies, hits Grobull with a projectile that depletes his shield! Once the shield is down, Grobull becomes vulnerable for ten seconds! Only then you should focus on him and attack with everything you have. Having a good group DPS will make the fight easier, since you will be able to kill the Boss faster. Still this fight is doable with lower DPS but you will have to repeat the phases more times!
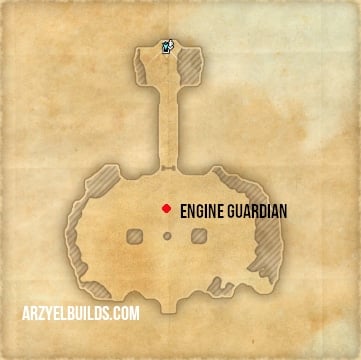
The Engine Guardian – Darkshade Caverns 2
The Final Boss of the Dungeon and a quite challenging fight! The Engine Guardian resembles the final Boss of Darkshade Caverns 1, since there are different color-coded phases here as well! After you defeat Grobull the Transmuted, head to the entrance of the Final Boss’ area. Defeat the army of constructs that is guarding it and get to his room!
When the first player enters the room, the Engine Guardian will wake up and the door will close. Wait for all four players to gather, then enter. Otherwise you will have to either complete the fight with fewer players or simply wipe on purpose for the rest of the group to enter!

The Engine Guardian is a Large, arachnid construct with three different phases that the Tank cannot really aggro and keep still!! The phases are color-coded and you can tell which one is active by the color on its head and body:
- Red
- Blue
- Green
In general the Boss will be moving around the room but will often sit down in order to switch phases! When it is sitting down is also more vulnerable to your attacks! It will be wise to wait for it to sit down in order to hit it with your Ultimates!
When in Red phase, it will use a flamethrower attack while spinning its head around. Block when the flame is heading your way or move around it to avoid damage! It will also shoot fire projectiles that explode when they touch the ground and deal AOE damage!
In Blue phase it will attack with Shock beams and summon Dwarven Spheres! Kill the spheres as fast as possible or else they will overwhelm you! They also have their own attacks that can deal significant damage. Your goal in this phase is to kill the spheres first!
Finally the Green phase is probably the deadliest! Poison fills the room and slowly damages you! If the healer cannot keep up you might have a problem. Especially if there are spheres around! You can however negate the Poison by using all four levers in the middle of the room! You might not want to do this though if you are after a Hard-mode clear!
How to Activate Darkshade Caverns 2 Veteran Hard Mode – The Engine Guardian Boss Fight
If Darkshade Caverns 2 is one of your Daily Undaunted Pledges, you might want to earn more Undaunted Keys by completing it in Veteran Hardmode difficulty. Unlike most other Dungeons, there is no Scroll of Glorious Battle in here.
So in order to activate and complete the Veteran Hard Mode difficulty in Darkshade Caverns 2, you should avoid using the levers when The Engine Guardian is in its Green phase and the room is filled with Poison! If you kill the Boss without negating the poison you will complete the Dungeon in Hardmode difficulty!

Arzyel is a passionate Gamer and huge fan of the Elder Scrolls Series! A professional Content Creator and owner of the arzyelbuilds.com website that is focusing on The Elder Scrolls Online with the Best ESO Builds and Guides, as well as Throne and Liberty content with several TL Builds and Guides! Arzyel also publishes videos on his YouTube channel!
Thanks to his experience in Gaming and especially Online Gaming, Arzyel can create practical and effective Builds & Guides for ESO, Throne and Liberty and other titles, that are perfect for both New and Veteran Players! For more info you can check his Linktree and his About Me page.