

ESO Coral Aerie Dungeon
Coral Aerie is one of the two 4-man Dungeons, that were added to ESO with the Ascending Tide DLC! The dungeon entrance is located in the zone of Summerset. Coral Aerie adds new achievements, challenges and four new Armor Sets in ESO. In total there are seven bosses you can defeat in the dungeon, three main bosses and four secret, optional bosses. Defeating the first three secret bosses, rewards you with buffs that will help you complete the dungeon objectives but will also unlock the last secret Boss. This Coral Aerie Dungeon Guide will focus on the Boss fights, their attack patterns and where you can find all secret bosses.
Table of Contents
Armor Sets in Coral Aerie Dungeon ESO
There are four Armor Sets you can get from enemies in the Dungeon, a Light, Medium, Heavy and a Monster Set. The armor Sets you can farm here are:
- Maligalig’s Maelstrom, Light Armor Set
- Gryphon’s Reprisal, Medium Armor Set
- Glacial Guardian, Heavy Armor Set
- Kargaeda, Monster Set(Final Boss, Veteran difficulty only)
Main Bosses in Coral Aerie Dungeon ESO
You can find the three main bosses of the dungeon by simply following the path inside. Each one of the bosses has its own unique attack patterns and can summon minions to assist in fight.

Maligalig – Coral Aerie Dungeon Guide
The first main Boss of Coral Aerie that can be a challenging opponent. Her Light attacks are not that dangerous but her Heavy Attack can be devastating. She will Empower her Arms and heavy attack twice. Tank must hold aggro and block those attacks because DPS and Healers will not survive them.
During the fight she can also summon several yaghra enemies to attack players. The yaghra will focus a player, jump close and explode. Block or dodge this attack to survive. Another attack will place a shock AOE under the player that deals constant damage. You can dispel the AOE by entering the designated area(green circle).
At around 70%-60% and 30% Health she will flood the area and force you to move around in the water. Use Surging Waters as you move around, to jump onto the three ledges and defeat the enemies up there. Your goal is to kill the Ripple of Maligalig enemies. Killing the Ripples will end the flood and allow you to continue the fight. The other enemies near them can be ignored. The tank should hold aggro while DPS is killing the ripples. This mechanic can be tricky so make sure to jump all on the same ledge and move together. In hardmode you also get a debuff while killing the ripples. You can dispel the debuff by entering the water again.
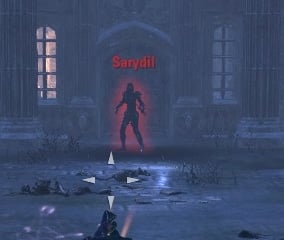
Sarydil – Coral Aerie Dungeon Guide
An agile Boss that summons minions and deals AOE damage. She can teleport to players with a skill similar to Nightblade’s Teleport Strike and deal significant damage with her Heavy Attack. She can also dash around the area leaving traps behind. At around 74% and 34% Health she will jump on the top part of the area, where you cannot reach her and summon minions.
Minions will attack players randomly while she and her archers fire against you. Sarydil also randomly marks a player to spawn traps under him. Move around to avoid being damaged. When the minions are defeated she will trigger the traps on the ground and cause them to explode. Block or dodge the AOE damage from the traps to survive.
She also throws a fire bomb that deals fire AOE damage and will summon shades of herself to attack you from range. Interrupt the shades to make them disappear and force her to appear again. An Ascendant Bulwark will also join the fight during the second minions phase(around 34%-30% Health). A big tanky enemy with strong attacks and a shield. In Hardmode another type of minion will also join the fight, the Ascendant Stormshaper. It deals massive AOE shock damage and it is wise to interrupt its attacks.
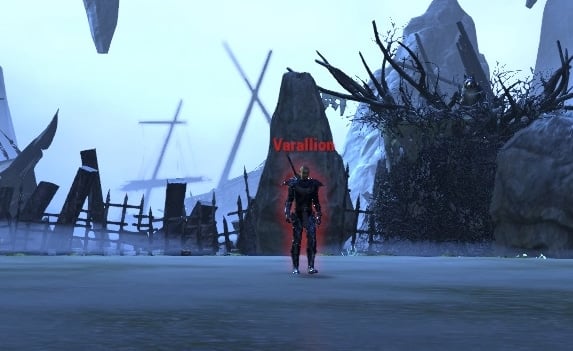
Varallion – Coral Aerie Dungeon Guide
This is the final main Boss of the Dungeon. He can summon Gryphons to assist him in fight. Two in Normal difficulty, three in Veteran difficulty and four in Hardmode. Each Gryphon has a special attack move you need to be careful of.
His Light and Heavy Attacks are not that scary and the tank can easily block them(DPS and Healer will probably die). The AOEs that spawns in the area during the fight are a bigger threat. During the fight big lines of AOE attacks will appear. The tank should move the Boss out of the AOE and all players must avoid them. Varallion will also debuff players(Dark Energy AOEs) and summon a Sea Orb that deals damage to nearby players. You can kill the orb and outheal the debuff. The Sea Orb moves towards the marked player, so it is easy to take it away from the group.
Gryphons appear randomly during the fight and follow their unique attack pattern. All Gryphons Light and Heavy Attack and have a Conal front attack as well.
- Mafremare summons two Tornadoes moving around him, dealing damage. Avoid the Tornadoes and kill the Gryphon fast.
- Iliata summons a large shock AOE that moves around slowly as well as smaller lightning strikes.
- Ofallo debuffs the player that holds aggro, so usually the Tank.
In Hardmode the AOE lines will come from every direction, forming a T. Verallion will tether two players, that need to stay together. If one of the tethered players die, the other will die as well. Also if another player touches the tether, will die instantly. At around 30%-25% Health, Kargaeda, the biggest Gryphon, will also join the fight. Kargaeda summons a shield for Varallion that will only break once it is dead but also a geyser in the middle of the area that spawns shock AOEs.
All Secret Bosses in Coral Aerie Dungeon ESO
There are four secret bosses you can defeat in the Dungeon. The first three bosses reward you with a special buff that can help you complete the dungeon with success but also unlock the final secret Boss. All four fights are relatively easy. Once you defeat the first secret boss, you will also receive the Abyssal Knowing effect. It will be active for the rest of the dungeon. With Abyssal Knowing active “A Tendril joins you in combat against your enemies. Stand near a Tendril to command it to move. When a Tendril spawns, one Alchemical Globule will appear. Each Alchemical Globule you collect shields you from 33% of incoming damage until you have three Alchemical Globules.” These are the four Secret Bosses in Coral Aerie.
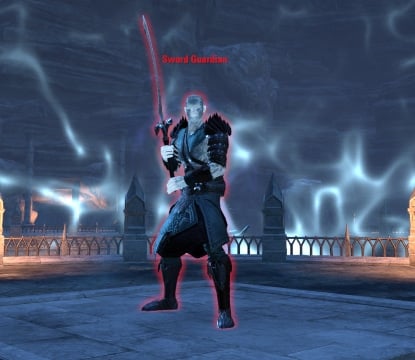
Sword Guardian – Coral Aerie Dungeon Guide
The Sword Guardian is the first secret Boss of the Coral Aerie Dungeon.
Where to Find Sword Guardian in Coral Aerie Dungeon
You can find the entrance to his platform right before the Maligalig first Boss. An overall easy enemy with strong Light and Heavy Attacks. The Tank can block them easily but DPS and healers will struggle to survive them. He will summon shock AOEs under players that deal constant damage. Avoid getting near to other players while they are active. He can also summon extra AOEs to deal damage.

Once you defeat him, you will receive the Sword Covenant buff, which increases Weapon and Spell Critical by 10%.
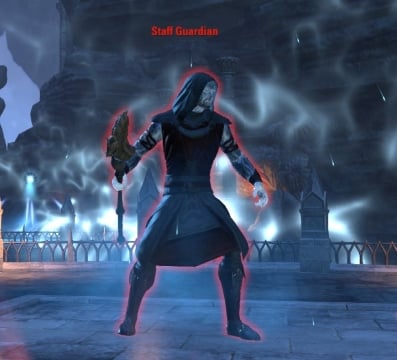
Staff Guardian – Coral Aerie Dungeon Guide
This is the second Secret boss of the Coral Aerie dungeon.
Where to Find Staff Guardian in Coral Aerie Dungeon
You can find the entrance to his area, on the North Eastern part of the map. This boss will summon static AOEs on the ground that will force to explode later. Avoid the AOEs to survive. He will also Light Attack with his Staff. His Light Attacks are strong, target multiple players and the Tank should hold aggro close to him. He can also melee attack with his staff.

When you defeat him you will receive the Staff Covenant buff which increases Max Magicka and Max Stamina by 10%.
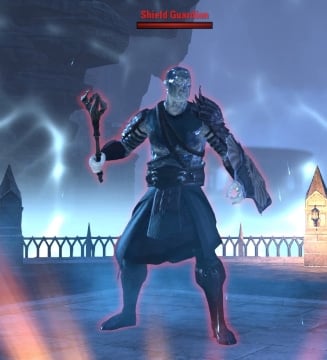
Shield Guardian
The third secret boss of the Coral Aerie Dungeon.
Where to Find Shield Guardian in Coral Aerie Dungeon
You can find the entrance to his area in the third map of the dungeon, behind a locked door. The lock on the door is of Master difficulty. He mostly Light Attacks and bashes with his shield. At around 65% and 25% Health he will summon three Ice projections of him and become invulnerable. The projections will freeze and slow you down, so kill them fast.

After you defeat him, you will receive the Shield Covenant buff which increases Max Health by 10%.
Z’Baza – Coral Aerie Dungeon Guide
Z’baza is the final secret Boss of Coral Aerie and will only spawn if you have defeated the previous three. After you defeat Varallion, Z’baza’s projection will appear and open a portal to his prison. Use the portal and each player should stand on one of the four plates to release Z’baza.
How to Defeat Z’Baza in Coral Aerie Dungeon
When the fight starts, Z’baza will steal Abyssal Knowing from you and use the tendrils against you. Overall this is an easy Boss fight though. Z’baza can attack all four players simultaneously with a line type of attack(anyone in front of him), summon AOEs on the ground and can summon Alchemical Tendrils that spawn orbs. Orbs target players and move towards them. He can also spawn Radiant Tendrils that spawn more AOEs. Kill the Tendrils to stop Orbs and AOEs from spawning.
He can teleport around while leaving behind an Abyssal Passenger interaction. Use it to teleport next to him. At around 55% and 25% Health he will summon a Conduit Tendril and a very large AOE while turning invulnerable. Kill the Conduit Tendril to stop the AOE and be able to damage him again.
Coral Aerie is a fun and challenging Dungeon with interesting mechanics! Completing the Dungeon can offer additional rewards when certain Events, like the Legacy of the Bretons are live!

Arzyel is a passionate Gamer and huge fan of the Elder Scrolls Series! A professional Content Creator and owner of the arzyelbuilds.com website that is focusing on The Elder Scrolls Online with the Best ESO Builds and Guides, as well as Throne and Liberty content with several TL Builds and Guides! Arzyel also publishes videos on his YouTube channel!
Thanks to his experience in Gaming and especially Online Gaming, Arzyel can create practical and effective Builds & Guides for ESO, Throne and Liberty and other titles, that are perfect for both New and Veteran Players! For more info you can check his Linktree and his About Me page.