

Colossal Coliseum Dungeon Guide
Best Colossal Coliseum Dungeon Guide for Throne and Liberty! This guide will show you how to defeat the Dungeon’s Bosses and complete it successfully.
What is Colossal Coliseum in Throne and Liberty?
Colossal Coliseum is a Level 55 Dungeon, that offers great rewards to players. A difficult Dungeon with unique mechanics and Bosses in Throne and Liberty. To access it you need a minimum Combat Power of 4000.
Colossal Coliseum Layout
This Dungeon is slightly different from what exists already in Throne and Liberty! It basically consists of one large area, an Arena, where fighting takes place. Progressing to the last Boss Fight is quite straightforward as well.
When you first enter the area, you will have to defeat a horde of undead enemies. The goal is to defeat 150 enemies, as well as two Silent Punisher special units. Silent Punisher can be deadly. When they mark a player with a Skull over their head, that player has to enter their shield and stay there. If you fail to stay inside the shield, the Punisher will cast an AOE skill that wipes your party.
When you defeat the horde, Maun, a mini Boss will appear. Maun’s deadliest attack consists of generating four green cubes in the area. The cubes have numbers above them that indicate how many players should enter. While you are fighting the horde and Maun, you can return to the area even if you die. When you defeat Maun, interact with the lever in the area to summon Nerzatum, the final Boss of the Dungeon.
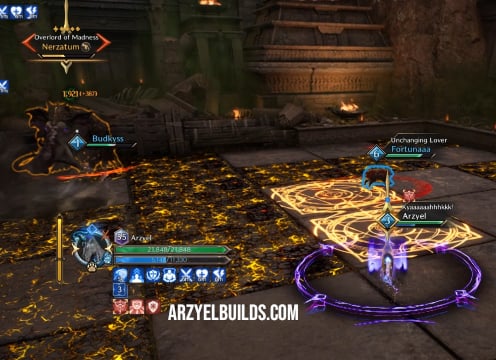
How to Defeat Nerzatum in Colossal Coliseum Dungeon
Nerzatum is the final Boss of the Dungeon. A quite challenging enemy with deadly mechanics. When you know what to do however, this fight is quite easy. These are his main moves:
- Wrath Attack to whoever has aggro.
- Wrath AOE attack covering the entire area.
- Fury AOE attack covering the entire area.
- Summons two shadow elephants, that charge toward a purple paint tile each. If they reach their tiles, a dark purple tile will appear in the arena. Stepping in that tile will instantly kill you. To prevent dark purple tiles from appearing, a player should stand on each purple tile and block while the elephants approach.
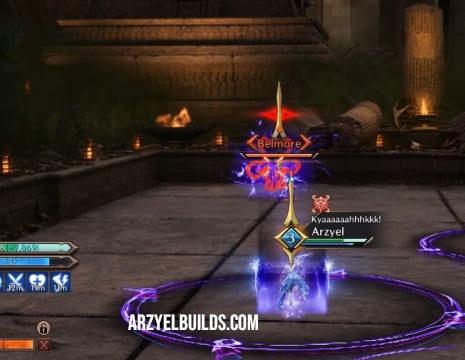
- Summons two Belmore units in the arena and all players get a purple circle around them. Two players should kill the Belmore units. These players will now get a red circle around them. The red marked players should run around the arena and uncover three Golden Circles. Players that still have purple circles around them should enter these 3 gold circles in time. If you fail, the Boss will wipe the group. If you succeed, the Boss will be stunned for some time and you can nuke him. Additionally, the players that enter the Golden Circles, will also get a smaller Golden circle around them. They can now step in the yellow tiles in the arena, to clear them.
- Nerzatum charges forward. You can see an orange line towards the way he will charge before he performs this mechanic. Get out of his way!
- Nerzatum pulls players to him. You can see a dark purple conal before he performs this mechanic. This pull does not hurt players but can be deadly if he pulls you to a Dark Purple Tile.
An overall easy Dungeon when you know the mechanics, that can be scary however if you are trying to clear it for the first time. For the Best Builds you can use to clear this Dungeon and prepare for the rest, you can take a look at my Throne and Liberty Builds!

Arzyel is a passionate Gamer and huge fan of the Elder Scrolls Series! A professional Content Creator and owner of the arzyelbuilds.com website that is focusing on The Elder Scrolls Online with the Best ESO Builds and Guides, as well as Throne and Liberty content with several TL Builds and Guides! Arzyel also publishes videos on his YouTube channel!
Thanks to his experience in Gaming and especially Online Gaming, Arzyel can create practical and effective Builds & Guides for ESO, Throne and Liberty and other titles, that are perfect for both New and Veteran Players! For more info you can check his Linktree and his About Me page.