
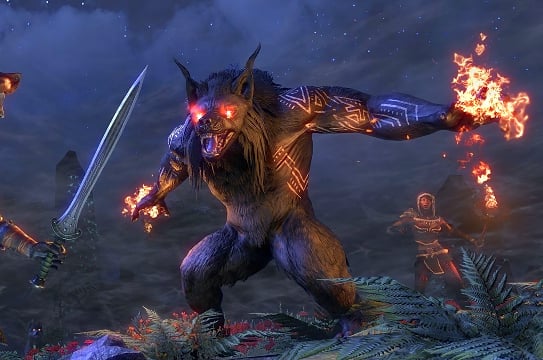
ESO March of Sacrifices
March of Sacrifices is a Group Dungeon in ESO, that also offers a Solo version! You can find its entrance in the Greenshade zone or access it through the Dungeon Finder. Inside the Dungeon you can farm three armor sets and two monster Sets, depending on whether you play the Group or Solo version.
Additionally you can earn the Werewolf Behemoth Sigil Memento by completing a hidden challenge! This guide will show you how to defeat all the Bosses inside the Dungeon, complete its special mechanics, and unlock the Memento.
All March of Sacrifices Bosses
These are the Bosses you can fight inside the March of Sacrifices Dungeon. Follow the road inside the Dungeon to find them:
- The Wyrd Sisters
- Aghaedh of the Solstice
- Dagrund the Bulky
- Tarcyr
- Balorgh
How to Defeat The Wyrd Sisters
The Wyrd Sisters are a group of three enemies consisting of a Tank (Ursus), a Mage (Rangifer), and an Archer (Strigidae). Each enemy has special attacks that can deal massive damage. Your Tank should try to keep aggro of all three to help the group survive.
Ursus performs a powerful Heavy Attack to whoever has aggro. This attack will kill you if you do not block as a Tank. Other members of the party will need to dodge this attack if they wish to survive. Sometimes she will charge the farthest group member. Block or dodge this attack and let the tank resume aggro. Focus on defeating Ursus as fast as possible.
Rangifer is a mage that can heal the other two sisters. Interrupt her heals and try to kill her right after Ursus or at the same time.
Strigidae is the archer of the group and a quite dangerous enemy. She has a blue aura around her that silences your party. Keep her away from the other two bosses to deal with them fast. She can teleport around the area and bring her silence aura with her. Move away when she does that.
Casts a cone attack at the direction of the group that you also need to avoid. Occasionally she will focus on a group member and charge a deadly attack. Interrupt her to survive.
How to Defeat Aghaedh of the Solstice
Aghaedh of the Solstice is the second Boss of the Dungeon. A stationary Boss with a few interesting attacks. She can summon stranglers that deal damage from distance. Kill those to avoid being overwhelmed. She will also summon Lurchers that perform a strong heavy attack when they appear. The Tank should aggro them and keep them away from the other group members.
The Boss is surrounded by four colored circles that hit you with a different debuff. The lurchers you kill match those colors. Pick the synergies(orbs) they drop and when the Boss is ready to unleash a deadly explosion, stand on the appropriate colored circle(red orb to red circle etc.) to survive.
How to Defeat Dagrund the Bulky
Dagrund the Bulky is the third Boss of the Dungeon. He performs leaping attacks and summons minions to overwhelm you. Your number one priority is to kill his minions as fast as possible.
Your Tank should aggro him and hold him away from the group. He performs an elemental attack with his sword that deals fire and later frost and shock AoE damage. He also performs a deadly Heavy Attack that you need to block to survive(as a tank).
Occasionally he will jump on the air and smash on the ground. Avoid the large AOE that indicates where he will land. When he lands, more AOE attacks will spread out from his location.
How to Defeat Tarcyr
You have to be stealthy and have patience to defeat Tarcyr! When you enter his area crouch and wait for him to appear. A wisp will appear and fly around. Follow it and interact with it when it stops. Do this enough times to force Tarcyr to appear. Stay crouched while following the Wisps!
When he appears he summons minions that you have to kill fast. He also performs a Lightning attack that deals massive AOE damage. Interrupt him to stop this. He also runs wild while leaving behind him a fire trail. Stay away from the fire or you will take significant damage. Tarcyr can also fire a projectile to whoever is in front of him as well as cause multiple stags to appear and attempt to stampede the group.

How to Defeat Balorgh
Balorgh is the final Boss of the Dungeon and a challenging enemy! He has a few deadly attacks including a breath AOE attack that he performs against the player that has aggro. As a Tank block this attack and try to face him away from your group.
Balorgh can summon plants on the islands that deal poison damage. Do not stand on the islands when this attack is live. To survive the poison your group will stand on the water in the area. This is why he usually performs a shock attack after the plants. Immediately leave the water and get back on the islands to avoid electrocution and survive.
Balorgh can also charge at the player with aggro. Avoid this attack but also the fire trail that leaves behind. Likewise when he performs a Heavy Attack block it to survive. If you are not the Tank, dodge! He will also slam his hands on the ground and summon fire AOEs that you need to avoid.
Balorgh can summon darkness and hide from your group. When in this phase he targets a random player and hunts them down. You can only survive this mechanic by heading to the light. Stand behind the light and wait for Balorgh to get in touch with it. When this happens he will appear again and you can deal damage to him. Depending on the difficulty of the fight he can also summon minions while in this phase.
How to Unlock the Werewolf Behemoth Sigil Memento
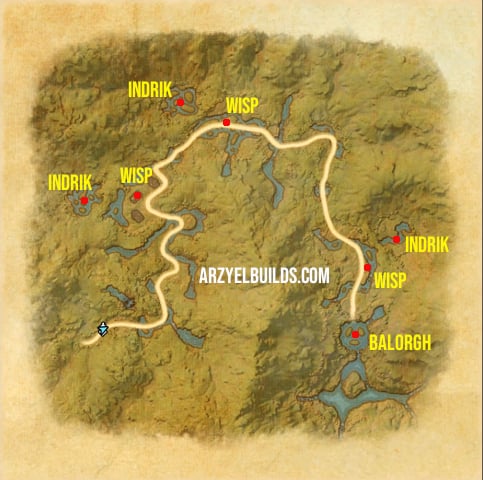
You can unlock the Werewolf Behemoth Sigil Memento inside the March of Sacrifices Dungeon by completing three challenges. These challenges use the same mechanics as the Tarcyr hunt phase. Find the three Wisps(shown on the map above) and interact with them.
Follow them to a nearby area and stay crouched. Follow the wisps around and interact again with them until a Golden Indrik appears. Defeat the Golden Indrik to obtain a boon that will help you in the dungeon. You need to defeat all three Golden Indriks to unlock the Memento. These are the 3 boons you can obtain:
- Boon of Ferocity – Increases Damage, more if you are a Werewolf
- Boon of Prowling – Grants stamina and you can move freely while crouching
- Boon of Hardiness – Increases Max Health and reduces damage taken, more if you are a Werewolf
March of Sacrifices Solo Dungeon Meted Misfortunes
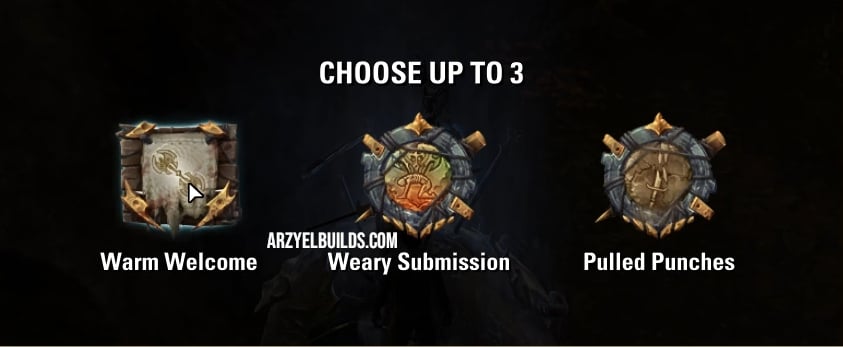
The Solo version of the Dungeon offers the same enemies and mechanics. You can optionally increase the difficulty by activating up to three Meted Misfortunes. The available Misfortunes are:
- Warm Welcome – Enemies deal double damage.
- Weary Submission – Health, Stamina and Magicka Recovery are reduced.
- Pulled Punches – Light and Heavy Attacks deal zero damage.
March of Sacrifices Dungeon Rewards
March of Sacrifices offers three Armor Sets and two Monster Sets, with the available Monster Set depending on the version you complete. These Sets are:
- Hanu’s Compassion, Light Armor Set
- Blood Moon, Medium Armor Set
- Haven of Ursus, Heavy Armor Set
- Balorgh, Monster Set – Group Dungeon in Veteran Difficulty
- Tarcyr, Monster Set – Solo Dungeon
March of Sacrifices is a challenging ESO Dungeon featuring deadly Bosses, unique mechanics, hidden challenges, and valuable rewards. Make sure to bring a proper DPS or Solo Build depending on which version you plan to tackle!

Arzyel is a passionate Gamer and huge fan of the Elder Scrolls Series! A professional Content Creator and owner of the arzyelbuilds.com website that is focusing on The Elder Scrolls Online with the Best ESO Builds and Guides, as well as Soulframe and Throne and Liberty content with several Builds and Guides! Arzyel also publishes videos on his YouTube channel and streams on Twitch!
Thanks to his experience in Gaming and especially Online Gaming, Arzyel can create practical and effective Builds & Guides for ESO, Soulframe, Throne and Liberty and other titles, that are perfect for both New and Veteran Players! For more info you can check his Linktree and his About Me page.