

Death’s Abyss Dungeon Guide
Best Death’s Abyss Dungeon Guide for Throne and Liberty! This Guide will show you everything you need to know to complete the Dungeon, including the necessary mechanics to defeat all Bosses.
What is Death’s Abyss in Throne and Liberty?
Death’s Abyss is one of the Level 50 Dungeons you can unlock in Throne and Liberty! A harder version of the Specter’s Abyss Level 20 Dungeon with slightly different mechanics and a harder Final Boss fight. You can access the Dungeon from the Co-Op Dungeons tab in your options. You can also request a Party Matchmaking from there, that will put you in a group of six(6) players and teleport you to the Dungeon. To enter the Dungeon you must be Level 50 but also have a minimum Combat Power of 1600!
How to Improve Combat Power in Throne and Liberty?
Combat Power is an indication of how strong your character is in Throne and Liberty! In order to enter various Dungeons, you will need to reach a specific level of Combat Power. To enter the Death’s Abyss Dungeon you need to reach 1600 Combat Power.
To check your Combat Power, press “P” to open your character’s info. You can check your Combat Power right below your Stats! The easiest way to improve your Combat Power in Throne and Liberty is by improving your gear. You can upgrade your armor to boost your Combat power or you can replace it with better quality gear!
Death’s Abyss Bosses
There are three Bosses inside the Death’s Abyss Dungeon that you need to defeat in order to complete it! One Main Boss and two mini-Bosses. These are:
- Karnix
- Elite Arkeum Shadowmancer
- Elite Arkeum Riot Squad Captain

The layout of the Dungeon is slightly different for its easier Specter’s Abyss version. There are two large rooms added now and the first Boss location has moved to the farthest of the two! Everything else remains almost identical. As you progress inside the first areas of the Dungeon you need to be careful of two enemies, the Enchanted Arkeum Arbiter and the Enhcanted Arkeum Healer.

The Enhcanted Arkeum Arbiter can charge at players and cast a deadly AOE that can wipe your entire party. When you see him charging his AOE, stun or interrupt him as fast as possible. The Enchanted Arkeum Healer, can heal other enemies inside the dungeon and make your life harder. Focus on killing this type of enemy fast.
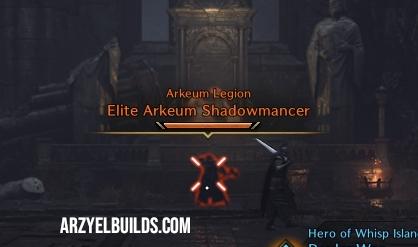
Elite Arkeum Shadowmancer Boss
The Elite Arkeum Shadowmancer is the first Boss of the Dungeon. You need to defeat her, in order to unlock the rest of the Dungeon. Her mechanics are not that different from its Specter’s Abyss Level 20 version:
- Fires normal projectiles with her Staff.
- Ground AOE attack on multiple players. She will summon a black hole on the feet of multiple players that deal damage.
- Large charged AOE that deals damage to everyone inside the area around her.
- Lifts multiple players on the air and after a few moments kills them! That is her deadliest attack. To avoid being killed someone in your party will have to stun the Boss and interrupt her attack.

Elite Arkeum Riot Squad Captain Boss
When you defeat the Shadowmancer you will gain access to the second part of the Dungeon! The second Boss is inside a room with two active environmental hazards that will kill your entire party if you step inside. Before you can fight him, interact with the two levers on the two side rooms to disable the hazards!
To speed up the process you can focus on one side room as a group to clear enemies and interact with the Lever there. A player equipped with a Dagger can sneak inside the other room with Camouflage Cloak, interact with the second lever and return to the party. You can now enter the main room of this area, clear some of the normal enemies first and then engage the second Boss of the Dungeon. His mechanics are again not that much different from the easier version of the Dungeon:
- Normal Sword attacks to the player that has aggro, which hopefully is the Tank!
- A ground fire attack that expands in three lines in front of him, again towards the player that has aggro.
- Occasionally he charges a player and bashes them with his shield.
- He does a wide AOE attack that deals damage and pushes back players.
- The Boss will summon a Blue Shield that absorbs all damage. After summoning his Shield, he will wait a few moments then cast a deadly AOE attack that will kill the entire group. You need to DPS him so you can turn his Shield Red. When the shield turns Red the Tank should stun or push him back to interrupt his deadly mechanic!

Karnix Final Boss in Specter’s Abyss Dungeon
Karnix is the final and hardest Boss of the Death’s Abyss Dungeon in Throne and Liberty! He repeats several of Haliber’s mechanics from Specter’s Abyss but also introduces a couple new and deadly ones:
- He makes normal attacks with his Scythe to the player that holds aggro.
- Occasionally fires a front conal attack that leaves behind spikes and hurts everyone caught in the area. The attack goes towards the direction of the player with aggro.
- Sometimes Karnix will teleport to the furthest from him player and unleash his Conal AOE attack. If you are that player make sure to move sideways and turn him away from the rest of your group, so his attack will not caught others unprepared.
- He will often charge an AOE Heavy Attack(purple circles slowly closing) that deals massive damage and can kill the entire group. Make sure to block to avoid being damaged.
- Karnix will summon a Skull above multiple players and send spinning Scythes slowly against them. The Scythes deal damage to anyone on their path. The three players with the Skull on their head should head on different corners of the area and circle around the moving Scythes so they do not hurt other players.
- After his Skull attack, Karnix will summon a black circle under the feet of a player. That player should head to the center of the room and everyone else should rush to his position fast. Remain inside the circle, block the incoming attack and you will survive. If someone remains outside the circle or not enter it in time, then the entire group will take heavy damage.
- If half of your group is dead when the Circle mechanic happens, the player with the circle underneath them should stay away from the rest of the party and sacrifice themselves for the team.

Karnix is a challenging Boss that you can defeat easily however, as long as your group pays attention to mechanics. For the Best Builds you can use to clear this Dungeon and prepare for the rest, you can take a look at my Throne and Liberty Builds!

Arzyel is a passionate Gamer and huge fan of the Elder Scrolls Series! A professional Content Creator and owner of the arzyelbuilds.com website that is focusing on The Elder Scrolls Online with the Best ESO Builds and Guides, as well as Throne and Liberty content with several TL Builds and Guides! Arzyel also publishes videos on his YouTube channel!
Thanks to his experience in Gaming and especially Online Gaming, Arzyel can create practical and effective Builds & Guides for ESO, Throne and Liberty and other titles, that are perfect for both New and Veteran Players! For more info you can check his Linktree and his About Me page.