
ESO Shipwright’s Regret Dungeon
Shipwright’s Regret is one of the two 4-man Dungeons, that were added to ESO with the Ascending Tide DLC! The dungeon entrance is located in the zone of Rivenspire. Shipwright’s Regret adds new achievements, challenges and four Armor Sets in ESO. In total there are six bosses you can defeat in the dungeon, three main bosses and three secret, optional bosses. Defeating the secret bosses, rewards you with buffs that will help you complete the dungeon objectives. This Shipwright’s Regret Dungeon Guide will focus on the Boss fights, their attack patterns and where to find all secret, optional bosses.
Table of Contents
Armor Sets in Shipwright’s Regret Dungeon ESO
There are four Armor Sets you can get from enemies in the Dungeon, a Light, Medium, Heavy and a Monster Set. The armor Sets you can farm here are:
- Storm-Cursed’s Revenge, Light Armor Set
- Spriggan’s Vigor, Medium Armor Set
- Turning Tide, Heavy Armor Set
- Nazaray, Monster Set(Final Boss, Veteran difficulty only)

Main Bosses in Shipwright’s Regret Dungeon ESO
You can find the three main bosses of the dungeon by simply following the path inside. Each one of the bosses has its own unique attack patterns and can summon minions to assist in fight.
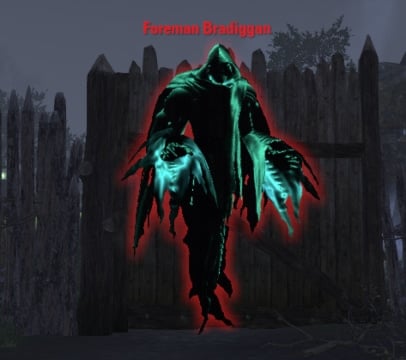
Foreman Bradiggan – Shipwright’s Regret Dungeon Guide
The first main Boss of the dungeon, an oversized wraith basically. He is mostly using AOE attacks that also fear players and summons minions, that can cause problems if left alive for too long. His most common attack is a Light Attack projectile that does not deal significant damage. From time to time though he will use a fully charged heavy attack that can instantly kill players. Block or dodge this one. He can also charge forward, dealing damage to players in his way. His charged AOE attack, spawns four smaller AOEs that move forward in different directions, fearing players.
At around 60% and 30% Health, he will summon a Flesh Colossus and place a large AOE under the players. The AOE deals damage, which increases if you get near other group members. While the AOE is active, spread out and try to kill the Colossus as fast as possible to make it disappear. The Colossus uses basic light attacks but can also stomp the ground and spawn a poison AOE, which grows bigger the longer it is alive. The Boss can also summon a couple more minions, Skeletal Flame Shapers and Harrowing Haunters.
Skeletal Flame Shapers are Fire Mages that can deal significant damage if not killed or interrupted fast. Harrowing Haunters on the other hand, tether to players and debuff them, reducing Armor, Damage and Healing. In Hardmode, the Boss will apply a Soul Bomb that deals significant damage and can wipe the group. Two players have to stack together to reduce its damage. This attack happens at around 30% Health.
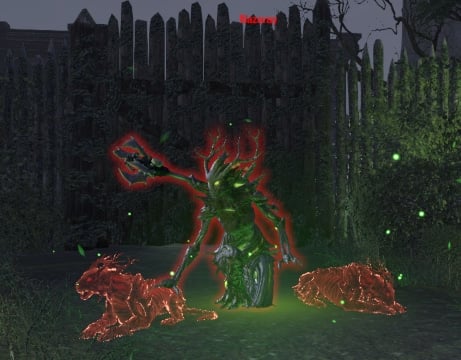
Nazaray – Shipwright’s Regret Dungeon Guide
Nazaray is the second Boss of the Shipwright’s Regret Dungeon. She is slightly more difficult than the previous Boss, thanks to her more complex attacks and minion summoning. Her Light Attacks are not that strong but she can deal significant damage with her fully charged heavy attack. Every now and then she will summon Poison meteors to drop from the sky and deal AOE damage. Later in the fight she will spawn blue energy AOEs that deal even more damage and her fully charged heavy attack will also send smaller AOEs in every direction.
Nazaray can also spawn another slow moving blue energy AOE. Overall this is a very AOE focused fight in a small area that makes things harder. She can summon a few minions as well. Giant Body Snatcher Wasps and Kindred Spirits. Giant Body Snatcher Wasp is a relatively easy enemy to kill while Kindred Spirits spawn at around 70% and 30% Health and will charge two types of AOE attacks. A conal attack and a circular AOE that grow bigger the more time they remain alive. Kill them as fast as possible to avoid being instantly killed by their overlapping AOE attacks. In Hard mode she will also summon three Untamed Kindreds that are like Kindred Spirits. They charge AOEs that will instantly kill you. Kill one fast to create room to survive.
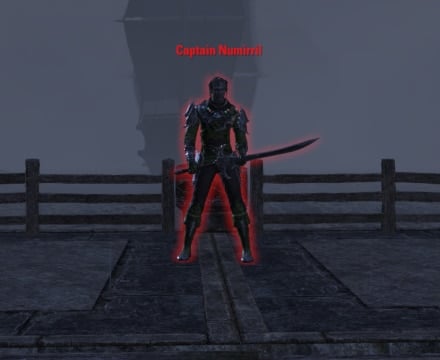
Captain Numirril – Shipwright’s Regret Dungeon Guide
This is the final Boss of the Shipwright’s Regret Dungeon. Overall this is an easy fight that overwhelms you with minions and AOE attacks. Captain Numirril is an interesting enemy that is using Water based attacks! His light attacks are easy to block and survive while his charged attack will move him around the area and deal damage to players in his way. He can also use a conal attack that has a cool sideways animation, as well as a large AOE that can deal significant damage.
Captain Numirril can also target players and spawn smaller AOEs under them. With another attack he can grab players, lift them and drop them hard on the ground. At around 85% and 40% Health, he will leave the area and summon Drowned Corpses. The Corpses spawn waves that run through the area and deal damage. They can also deal poison damage and spawn poison AOEs on the ground unless they are interrupted. Once the first wave of Corpses is defeated, a Drowned Hulk will spawn as well.
This is a slow moving enemy that can stomp the ground, summoning Poison AOEs and deal damage with a conal attack in front of it. Stay out of its way and kill it fast. When there are enough Poison AOEs on the ground, Captain Numirril can force them to explode and deal additional damage. Avoid stepping on those! In Hardmode the Boss will summon two Drowned Hulks at around 40% Health.
All Secret Bosses in Shipwright’s Regret Dungeon ESO
There are three secret bosses you can defeat in the Dungeon. Each boss rewards you with a special buff that can help you complete the dungeon with success. All three fights are relatively easy. The entrance to their location is near ghosts! If you see a ghost, there is a secret boss nearby! These are the three Secret Bosses in Shipwright’s Regret.

Where to find Lost Maiden – Shipwright’s Regret Dungeon Guide
The entrance to Frigid Cavern is inside a ruined building near the start of the dungeon and before the first main Boss. Lost Maiden is an easy Boss with a few basic attacks. She has a weak projectile Light Attack, a more dangerous Heavy Attack and she can summon Ice Pillars that deal damage and slow you down. Her Conal attack can freeze you while she can also rain down Ice. She will also attack occasionally with a large Ice AOE.

At around 65% Health she will summon three Maiden’s Fury that you have to defeat to deal damage to her again. They use the same basic attacks as her. When you defeat them they will stay as shades and will attack you again at around 30% Health, without you being able to attack them back. Once you defeat Lost Maiden, you will receive the Maiden’s Protection Buff. This Buff increases Maximum Magicka by 10% and When Health reaches 10% or less, you cast Outburst, gaining a temporary damage shield. Outburst has a 30s cooldown.

Where to find Shrouded Axeman – Shipwright’s Regret Dungeon Guide
Shrouded Axeman is the second secret boss and the trickiest in my opinion. You can find the entrance to his area right after the first main Boss on the right, under a waterfall. When you see the ghost lumberjack, jump down and enter the Misty Tunnel. The Shrouded Axeman has a few interesting mechanics that can wipe your group easily. His light attacks are dangerous while his fully charged heavy attack can be devastating. He often disappears while summoning four Shrouded Axeman’s Shadows that spawn blue energy AOEs on the ground. Interrupt them fast to stop them. When he appears again he cause the AOEs to explode dealing significant damage. This is why it is important to stop the shadows fast.

He will also summon often Wrath Hounds that lock onto players and explode near them. This can instantly kill you so make sure to block or dodge the attack. Another type of minions he can spawn are Shrouded Axeman’s Hounds that attack normally and are easy to kill. Once you defeat this Boss, you will earn the Shroud of the Axeman Buff. This increases Maximum Health by 10% and When hit by an attack that consumes 50% or more of your total Health cast Shrouded, increasing healing done by 100% for 5s. Shrouded has a 30s cooldown.

Where to find Storm-Cursed Sailor – Shipwright’s Regret Dungeon Guide
The last secret Boss of the Dungeon. You can find him behind a wrecked ship, after the second main boss. Just follow the ghosts and swim to his location. His light attacks are imbued with Shock damage and he can also cast a charged heavy attack on players that places a Shock AOE under them. The AOE deals constant damage to the player and others nearby. Also if you fall in the water while the AOE is active, you will die instantly.
He will also cast a shock AOE under him, that will give him a shock armor as well as teleport around, leaving more Shock AOEs on the ground to explode! When you defeat him, you will receive the Storm’s Curse Buff. This buff increases Maximum Stamina by 10% and Your Heavy Attacks gain Curse of the Storm, dealing 6k additional lightning damage to your target.
Overall this dungeon is quite fun and challenging with pretty straightforward mechanics! Completing the Dungeon can offer additional rewards when certain Events, like the Legacy of the Bretons are live!

Arzyel is a passionate Gamer and huge fan of the Elder Scrolls Series! A professional Content Creator and owner of the arzyelbuilds.com website that is focusing on The Elder Scrolls Online with the Best ESO Builds and Guides, as well as Throne and Liberty content with several TL Builds and Guides! Arzyel also publishes videos on his YouTube channel!
Thanks to his experience in Gaming and especially Online Gaming, Arzyel can create practical and effective Builds & Guides for ESO, Throne and Liberty and other titles, that are perfect for both New and Veteran Players! For more info you can check his Linktree and his About Me page.